
Make your own garlic dill pickles at home with this easy recipe, no special equipment needed! Option to make them spicy with the addition of dried chilis.
With over 1,000 recipes on this site, many of which are pretty original and interesting if I do say so, it completely baffles me that one of my top 3 posts in terms of traffic is how to make pickles.
Funny enough, the number 1 post on this site is how to ferment vegetables. Apparently people like their pickled, tangy, probiotic packed veggies?!

Yep, a post titled “Simple Homemade Pickles”, written 7 years ago where I openly admit to not really knowing what I was doing in the post consistently ranks.
So.very.odd.
But, I’ve decided to be a little more intentional this year with recipe creation.
Make less of the “weird” stuff (stuffed whole red snapper comes to mind there) and more of what seems to be popular (things like zucchini pasta with avocado cream sauce and roasted chickpeas).
And apparently, pickles.
So, let’s talk garlic dill pickles.

My original pickle recipe uses basic pickling spices: things like peppercorns, garlic and anise seeds.
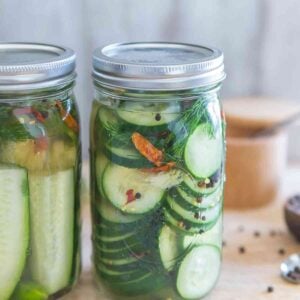
But, I do also love a good dill pickle so this recipe combines garlic, dill and (optional) dried chili peppers for a spicy kick.
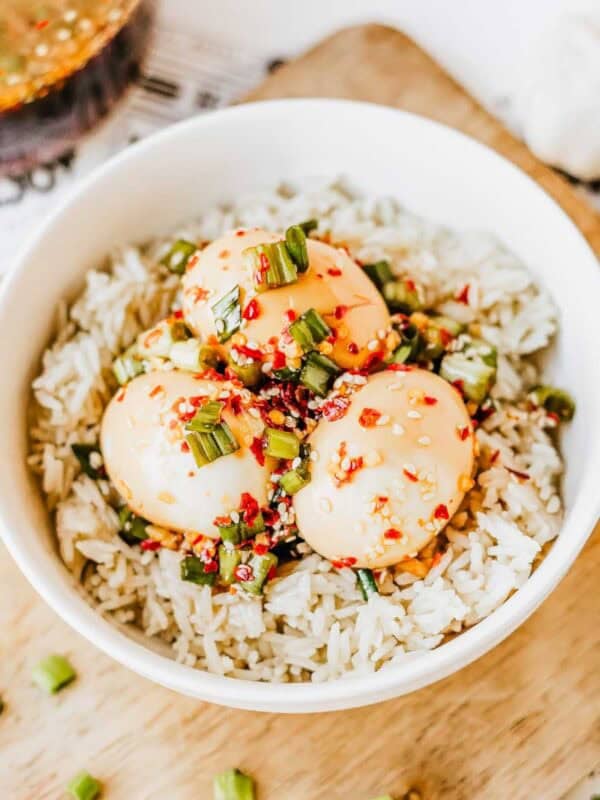
(Side note – I’ve had the dried chili peppers I used in these hot and spicy garlic dill pickles since I made this spicy beef and red pepper rice bowl 4 years ago – a bag of these things lasts forever!)
The method is exactly the same, it’s just a small tweak on the ingredients for a different flavored easy refrigerator pickle.
How To Make Garlic Dill Pickles
Like I run through in the video, making spicy garlic dill pickles is simple. You’ll need these ingredients:
- cucumbers
- garlic
- peppercorns
- salt
- fresh dill
- dried chili peppers (*if you’re going for the spicy option)
- apple cider vinegar
- water
- 1 quart wide mouth mason jars
![Wide Mouth Mason Jars 32 oz [4 Pack]](https://m.media-amazon.com/images/I/51tqoHt7NFL._SL500_.jpg)
You basically just pack all the ingredients into the jar, pour the water and apple cider vinegar mixture on top, making sure everything is submerged then tighten the lid and refrigerate for a minimum of 3 days before eating.
That’s literally all there is to these garlic dill refrigerator pickles (or any refrigerator pickle for that matter).
They’re so easy and there’s no need for actual canning under pressure.
The same process and method applies to pickled garlic scapes (which you’ll likely love too if you’re a pickle person), they just need a minimum of 2 weeks in the fridge before eating.

How Long Do The Pickles Need To Cure?
The spicy garlic dill pickles, or any refrigerator pickle really, should sit in the brine for at least 3 days before you taste them.
I tasted these at 3 days and they definitely had enough tang to call them a pickle but I preferred the taste at the 5 day mark.
It’s really up to you and how flavorful and tangy you like your pickles but anywhere from 3-7 days is a good rule of thumb.
How Long Do Refrigerator Pickles Last?
These homemade garlic dill pickles will last for about a month in the refrigerator.
After that, they might get a little mushy but I experimented with these a little and let them sit in my refrigerator for 6+ weeks now and they’re definitely still edible. The jar I cut in spears is just slightly mushy towards where the center of the cucumber/seeds are.
The taste is still great though!

What Kind of Cucumbers Should I Use?
A lot of sources will say Kirby cucumbers are best but I really don’t think it matters that much.
You want to stay away from English cucumbers because their skin is significantly thinner than other varieties and you want a thicker skin to hold up in the brine.
Other than that, just look for a small to medium sized good looking cucumber and you’ll be fine!

Can I Adjust the Spice Level?
The dried chilis in this recipe are totally optional. If you hate spice, omit them altogether.
If you love spice, I suggest using all 4 chilis I note in the ingredient list (8 really because you’ll be splitting them in half).
And if you’re somewhere in the middle, cut the amount of chilis in half or, don’t split them in half. Splitting the chilis releases the seeds in the middle and actually increases the spiciness.
I love spice and used 4 dried chilis in these and at that amount they’re not ‘burn your mouth’ hot, just a little kick to let you know they’re there!

What Can I Eat These Pickles With?
If you’re not reaching into the fridge and snacking on them straight out of the jar (no judgment there if so, I do it all the time!) here are some of my favorite recipes to pair these easy garlic dill pickles with.
Healthy Sloppy Joes
Creamy Dijon Egg Salad
Southwest Ranch Chicken Salad Cheddar Melt
Pickled Pineapple BBQ Pork Sandwiches (for double the pickled deliciousness!)
Roast Beef Smoked Gouda Grilled Cheese
Of course, these homemade garlic dill pickles would also be great on almost any of these burgers!
Spicy Garlic Dill Pickles
Ingredients
- 2 pounds cucumbers, regular or kirby
- 6 cloves garlic, peeled and slightly smashed
- 2-4 dried chilis, cut in half
- 1 teaspoon peppercorns
- 2 tablespoons kosher salt
- 1/2 cup fresh dill
- 1 1/2 cups apple cider vinegar
- 1 1/2 cups water
Instructions
- Cut cucumbers into spears, rounds or other shape of your choice and place them into 2 1-quart wide mouth mason jars.
- Place crushed/smashed garlic cloves, dried chili peppers and peppercorns in the jars with the pickles.
- Add the salt to the jars (1 tablespoon in each jar) then the fresh dill on top.
- Combine the apple cider vinegar and water in a small bowl or measuring cup and pour to the top of each jar, just covering the top of the ingredients.
- Using a spoon, press all the ingredients down into the liquid making sure they’re submerged.
- Cover tightly with the lids and place in the refrigerator for at least 3 days before eating (*see note).
Video
Notes
Nutrition
Nutrition information is automatically calculated, so should only be used as an approximation.

Gina Matsoukas is an AP syndicated writer. She is the founder, photographer and recipe developer of Running to the Kitchen — a food website focused on providing healthy, wholesome recipes using fresh and seasonal ingredients. Her work has been featured in numerous media outlets both digital and print, including MSN, Huffington post, Buzzfeed, Women’s Health and Food Network.


This is almost the recipe that my mom used, but she made “putting up” (heat canned) pickles.
Except she added one little thing – a few mustard seeds to each jar. BEST DAMN PICKLES in the WORLD.
Even after I ‘grew up’ and left, she still made enough so that I could drop around every few months and take a dozen jars or so back with me.
I do not think it helps to, use ANY vinegar in fermented VEGETABLES Vinegar WILL interfere with the LACTO-FERMANTATION process and is not necessaary to get an acidic sour taste. THe legth of fermentation depends on only two conditions -the SUGAR content of the vegetables used and temperature, When those sugars have been converted to LACTIC ACID which is in fact a close chemical relatiion to VINEGAR anyway fermentation ceases. The brine to be used is between 2 and 2.5% salt by weight [ie 20/25 gms a litre] Below 2 is too little and over 2.5 is too much.
It may even be useful to add a little LACTOSE to the vegetables to maintain consistenc. Both salt and vegetables are cheap enough to experiment after all and all vegetables vary condsiderable as too their sugar content at any given time of the season.
Another tip. I use the ‘juice of previous batches to ‘seed’ each succesive batch withn mprobiotics and LACTO BACTERIA much as SALAMI Cheese and wine etc. makers and cide/beer brewers develope their own hopefully distinctive organoleptic qualities.
Albert – this is a recipe for QUICK refrigerator pickles, not true fermented vegetables/pickles. Hence the use of vinegar. As I discuss in the post, I have recipes for true lacto-fermented vegetables (https://www.runningtothekitchen.com/how-to-ferment-vegetables/) if people prefer that. I also have a fermented red cabbage recipe (https://www.runningtothekitchen.com/red-cabbage-sauerkraut/).
Can the pickle liquid be used again for new batch of cucumbers or do I hv to throw them away?
I would suggest making a new batch for the best pickling power :)
@Susan, I do it all the time with no ill effect. What you are doing here is introducing your very own PROBIOTIC, LACTO-BACTERIA starter. Im still using a starter I first took from a batch of KIMCHI around a year and a half ago Brewwers do this, Wine makers do this, sourdough bread makers do this so,why not fermented veg bottlers??
These pickles are so dang good! I am planning to make another batch already, we can’t quit snacking on them!