
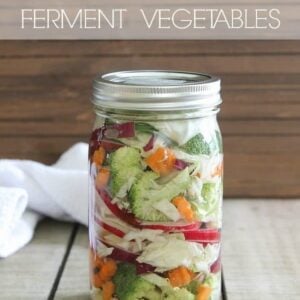
An easy homemade tutorial on how to ferment vegetables in a mason jar.
You’re probably thinking I’ve caught the hippie train straight out of here with this post but hear me out.
Do you like pickles? Yes? (note -you should check out this post on how to make simple homemade pickles and spicy garlic dill pickles if so).
Ok then, you’re going to like fermented vegetables.
So read on.

Unfortunately, I had to be on antibiotics 3 times over the last 6 months.
I absolutely hate taking them and believe me, if there was a way I could’ve avoided it, I would’ve.
I’m a huge proponent of probiotics so while I was filling prescriptions in the drug store these past few months, I was simultaneously buying some kick ass probiotics to try and help keep some good bacteria in my system.
And let me tell you, the *good* probiotic pills, yeah, well they’re costly.
Six times more costly than the antibiotics in fact.
So, when the second round of antibiotics came around, I decided that instead of spending $30 on probiotic pills and $4 kombucha bottles every time I ventured into the hippie-mart (my loving name for the local natural foods store), I should probably look into this whole lacto-fermented vegetable thing.
Lacto-fermented vegetables
Lacto-fermented…it sounds crazy, right?
First thing I thought was “wait, there’s milk in this?”
Um, no. Lacto, in this case, doesn’t refer to milk, it refers to lactic-acid.
The naturally occurring bacteria on fruits and vegetables is called lactobacillus. When they’re placed in an oxygen free environment, the bacteria convert sugar into lactic acid which is what gives fermented foods their characteristic tangy/sour flavor.
So now that the science lesson is out of the way, here’s the cool part:
Vegetables + water + salt + a few days = a probiotic powerhouse of tangy vegetable deliciousness.
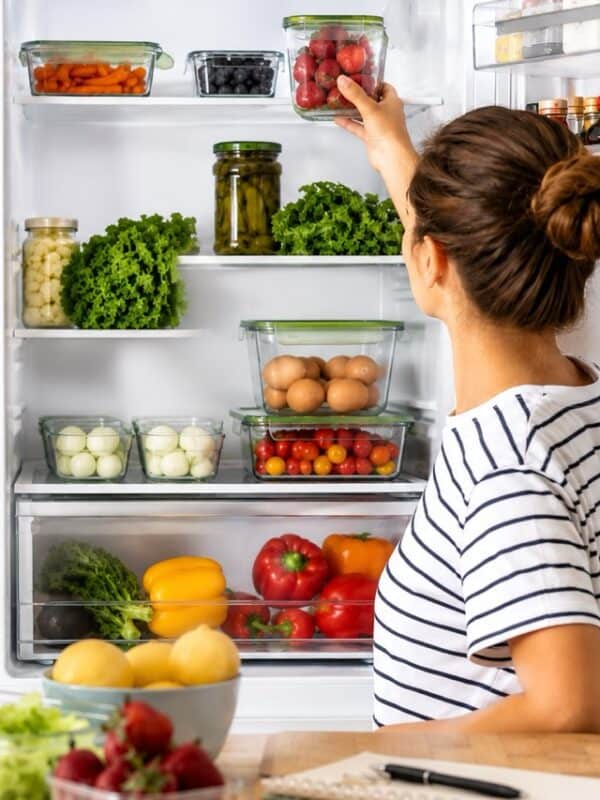
Bonus: it doesn’t cost $30 and they’ll last in the fridge for months.
How to Ferment Vegetables
What you’ll need to ferment vegetables:
- 1 quart wide mouth mason jar
- plastic lid
- sea salt
- water
These are the basics. There’s a whole world of fermentation supplies that can be purchased to make the process both easier and safer once you’ve got the method down.
-
![Wide Mouth Mason Jars 32 oz [4 Pack]](https://m.media-amazon.com/images/I/51tqoHt7NFL._SL500_.jpg) Buy Now$26.99
Buy Now$26.99We earn a commission if you make a purchase, at no additional cost to you.
03/23/2026 04:02 pm GMT -
![WIDE Mouth Mason Jar Lids [16 Pack]](https://m.media-amazon.com/images/I/315hC2lw8+L._SL500_.jpg) Buy Now$9.99
Buy Now$9.99We earn a commission if you make a purchase, at no additional cost to you.
03/23/2026 05:02 pm GMT -
 Buy Now$8.19
We earn a commission if you make a purchase, at no additional cost to you.
03/23/2026 07:01 pm GMT
You can literally ferment whatever vegetables you like. If you ferment cabbage you get red cabbage sauerkraut!
They’re perfect for snacking on or adding to your meals for a probiotic boost.
I’ve been adding them to salads, on top of my protein with lunch or dinner or, just picking at them throughout the day when I’m bored.
I do the same with pickled garlic scapes – another vegetable that transforms into a tangy delight once fermented/pickled.
Yeah, a lot of that.
And this is where I’m going to sound like a total nerd, but every time I eat them I silently say “take that, antibiotics.”
Kimchi is an Asian version of fermented vegetables so if you like that, you’ll definitely like these fermented vegetables.
Also make sure to try out this bulgogi kimchi rice plate and this kimchi potato hash.
More pickled recipes to try if you love the taste of fermented vegetables:
Spicy Pickled Pineapple
Balsamic Pickled Shiitake Crostini
Pickled Fennel Citrus Salad
Pickled Blueberry Panzanella Salad
Mango Melon Soup with Pickled Cucumber
How To Ferment Vegetables
Equipment
Ingredients
- sliced or chopped vegetables, anything will do, I really like broccoli, radishes and carrots
- 2 cups water
- 1 1/2 tablespoon coarse sea salt
- 1 quart wide mouth mason jar with plastic lid, not necessary, but if you’re going to do this often, the regular metal lids will corrode from the acid
- any spices or herbs you like, peppercorns, dill, basil, bay leaf, etc.
- 1 small cabbage leaf
Instructions
- Place vegetables and any spices/herbs you’re using in the mason jar right up to the bottom of the neck, there should be about 1 inch of space to the top.
- Stir the salt and water together until dissolved.
- Pour the salt water over the vegetables until it reaches just below the top of the jar. There should be about 1/2 inch of room left.
- Fold a small cabbage leaf and press it down on top of the vegetables so that it keeps the vegetables submerged in the salt water. This isn’t necessary, but helps make sure the vegetables are submerged. Feel free to skip this step if you don’t have cabbage on hand.
- Close the lid on the jar tightly and place the jars out of direct sunlight in a relatively moderate temperature (68-75 degrees).
- You will start to see some bubbling around day 2 or so. After day 2, over a sink (in case it leaks/drips), gently loosen the lids to let some of the gas escape once or twice a day.
- The vegetables are ready anywhere from day 4-10. The longer they sit, the more tangy they’ll be. Taste them starting on day 4 to figure out your preference. I like them best around day 5 or 6.
- Once you decide they’re the level of sourness you’re looking for, place the the jar in the refrigerator where it will keep for a couple of months (not that they’ll last that long!)
Nutrition
Nutrition information is automatically calculated, so should only be used as an approximation.

Gina Matsoukas is an AP syndicated writer. She is the founder, photographer and recipe developer of Running to the Kitchen — a food website focused on providing healthy, wholesome recipes using fresh and seasonal ingredients. Her work has been featured in numerous media outlets both digital and print, including MSN, Huffington post, Buzzfeed, Women’s Health and Food Network.


Dropping to a half pint for fermentation is getting tiny. I usually pickle in a five to ten gallon crock. You may want to commit to a quart at a time at least. If I remember correctly quart jar was the original posted recipe. I didn’t read all comments on the site, but would underscore the need for kosher or pickling salt. Iodized salt is a wonderful way to get iodine in most diets, but bad for pickles. Make sure the salt is iodine free.
I would be so grateful if you could translate your measurements (gallons, quarts, etc..) into smaller proportions e.g. pint & sub-divisions, pounds & ounces. For example, how much salt to 1/2 pint of water? Thanks for your great recipe.
This is so cool! Gonna give this a try!
I fermented a jar of baby carrots with juice from a store-bought sauerkraut and salt water. From the beginning I noticed small amount of white fuzzy stuff on the bottom of jar. Each day the white fuzzy stuff grew a bit on the bottom as well on the tip of baby carrots.
I think the fermentation is done, and the jar is moved to the fridge. But I’m afraid of eating them because of the this white fuzzy stuff. I have taken a picture of it if you want to see it.
You have no idea how much you have helped me. I have severe Adhd and for the past 6 months chronic diarrea. My Dr said if you heal your gut you will heal your head. After some research I was all in. First I dewormed myself…even though my test results all said no parasites. They were wrong by the way. Next….heal my gut. I knew about probiotics but prebiotics was new. So I made lots of fermented veggies with your recipe. My gut got better and when it started working right and delivering all the nutrients to my brain and the rest of my body I got so much better. I became me again. Why didn’t anyone tell me how to heal my gut. Unbelievable…it really made a difference in my health and my brain. Thank you so much. There are no words to describe the difference in my body and my brain.
So glad to hear this, be well!
Never knew about fermenting until now. Can’t wait to try it
I just started fermenting veggies today.in gallon jars.6 tbsp of sea salt to 16 cups water is this OK..??? ON A FERMENT SITE BUT NO 1 WOULD ANSWER MY QUESTIONS.SO WATCHED UTUBE.So glad I found u.thx
Instead of using sea salt, use Himalayan Pink Salt, brings out the flavor of your veggies. You’ll thank me later.
How many days did you ferment it when you used Himalayan salt?
Alayna, you let your veggies ferment for the same amount of time whether you use sea salt or Himalayan Pink Salt.
is it advisable to drink the water after fermenting the recipes .does it have any effect?
I’ve never done it but there would be nothing wrong with doing so if you wanted.
Debbie Bothwell,
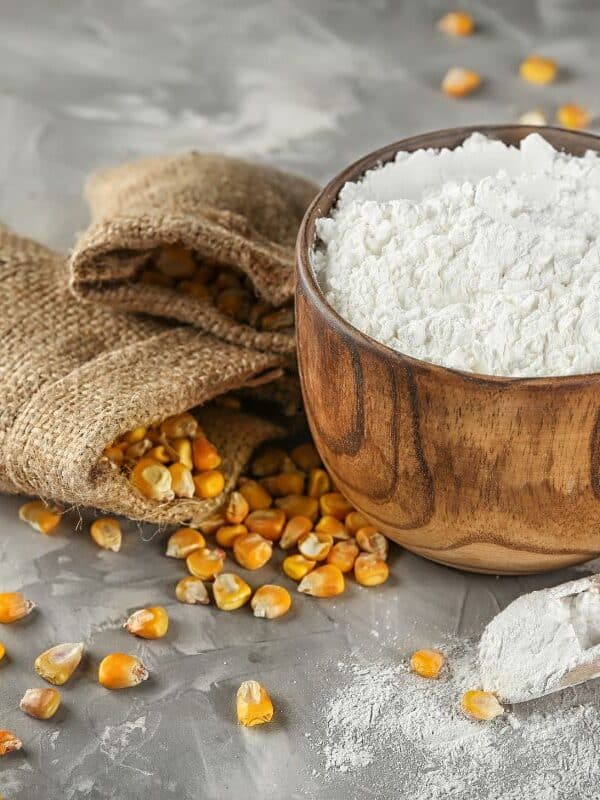
It’s a lot more helpful to measure your salt by weight not volume. Different types of salt will weigh differently. You want to create a 3% solution. Your 16 cups of water (1 gallon) weighs 3,785 grams. 3,785 X .03 = 113.5 grams of salt needed. It’s a simple calculation you can use for any amount of brine.
Can you ferment frozen veggies? I always have small amounts left in several bags in the freezer. And when is it safe to hot bath the jars. After fermentation stops? I worry the jar would explode if sealed before.
Someone above asked what to do with the brine after the veggies are consumed. It is FULL of probiotics, too! I love to take a swig or two of it from the jar as I snack on the veggies…it’s delicious! I’ve been making sauerkraut for years. Whatever juice is left in the crock after the sauerkraut gets jarred up gets saved in its own jar & we drink it up a few sips at a time. Yum!