Upgrade your holiday cookie game with these easy and festive Christmas tree cookies! Packed with chunks of chocolate and walnuts, they’re as delicious as they are adorable. Perfect for hanging on your tree or dunking in milk, these simple treats bring a fun twist to holiday baking without the sugar cookie overload.

My oven has been broken two out of the last three holiday seasons. That’s a story for another day, but I’m just so thankful it’s up and running this year so I can share some fun new Christmas cookie recipes with you all.
These Christmas tree cookies pull off what’s usually something pretty difficult: tasting good and serving as a cute ornament (if you want them to). The dough is filled with chopped chocolate and walnuts, then cut out into a Christmas tree shape and baked off.
While you can find plenty of varied approaches to a Christmas tree cut-out cookie, most of them use a sugar cookie base. I’m partial to this recipe because it’s not. I know sugar cookies are the norm for the holidays and fun decorating sessions, but they just don’t do it for me. I find them to be boring in taste and gobs of sugary frosting and food dye aren’t my thing. Give me chunks of chocolate studded throughout a cookie any day and a simple, understated classic design that would look adorable hung on a small Christmas tree for a holiday party.

Why You’ll Want These Christmas Tree Cookies On Your Baking List
- They’re simple. With only 8 ingredients and basic cookie making instructions, this recipe is an easy one to add to your holiday baking or a cookie exchange party.
- It’s fun for kids. Kids will love using the Christmas tree cookie cutters to make the cookies and creating the hole for the ornament string.
- It’s like a festive chocolate chip cookie. Everyone loves a good chocolate chip cookie and this recipe is essentially that in the shape of a Christmas tree.
- Their shape makes them perfect for dunking in milk. With the triangular shaped top, Christmas tree cookies are made for milk dunking!
Christmas Tree Cookie Ingredients
The simplicity of this ingredient list is one of my favorite parts of this recipe. Holiday baking can be chaotic so an ingredient list that relies on pantry staples is always welcome.

- Butter — Softened, room temperature unsalted butter is what you’ll want to use.
- Sugar — While I often bake with alternative sugars, regular granulated sugar works best in this recipe.
- Egg — Just one egg is all that’s needed for these cookies.
- Vanilla — The secret to a flavorful cookie.
- Salt — Don’t skip this, a little makes a big difference in any baking recipe.
- Flour — These cookies use regular all-purpose flour. I have not tried them yet with gluten-free flour but I bet that swap would work fine.
- Chocolate — I like to use dark chocolate that I chop by hand. Semi-sweet baker’s chocolate works too.
- Walnuts — Feel free to swap out the walnuts with another nut. Hazelnuts, pecans and macadamia nuts would all work well. Cashews make a good addition to most cookies too like these chocolate cashew cookies I made a few years back.

Here’s How To Make Them
You can find the full recipe below with ingredients and instructions, but here’s a quick run-down with pictures to help guide you through this Christmas tree cookie recipe.
Cream the butter and sugar
In a large bowl, beat the softened butter with the sugar using a handheld electric mixer until creamy and smooth.
Add the wet ingredients
Crack the egg into the bowl and pour in the vanilla extract. Mix again until incorporated and the mixture is light and fluffy.


Incorporate the dry ingredients
Add the flour and salt to the same bowl and mix until just incorporated making sure not to over-mix the batter.
Add the chocolate and walnuts
Use a food processor or a knife to chop the chocolate and walnuts to your preferred size. I like them pretty finely chopped for this recipe. Fold them into the batter until combined and well distributed.


Chill the dough
Turn the dough out onto a flat surface and form into a rectangular shape. Wrap tightly in plastic wrap and chill in the refrigerator for a minimum of 3 hours. You can prep the dough ahead to this point and keep it in the fridge until ready to bake.


Cut out the cookies
Remove the dough from the refrigerator and roll out on a floured surface to about 1/4″ thickness. Use a Christmas tree cookie cutter (any size or varied sizes will work. I like this set of 3 that features different sizes) to cut out the cookies. Re-roll any dough scraps to get as many cookies as possible. The amount will depend on the size of your cookie cutter.
Prepare for baking
Place the cut out cookies on a baking sheet lined with parchment paper. Use a straw or similar sized tool to make a hole in the top of the cookies if you plan to use them as an ornament. Place the baking sheet with the cookies into the fridge or freezer for 5-10 minutes before baking to help them hold their shape better while baking.


Bake the cookies
Bake the cookies at 350°F for about 12 minutes or until the edges are lightly golden brown.
Final adjustments
Once baked, remove from the oven and while the cookies are still warm, use the straw or whatever tool you used to make the hole to enlarge it if necessary. It will sometimes close up a bit during baking. Make sure to do this immediately when they’re removed from the oven as the cookies will harden once cooled. Allow the cookies to cool completely then thread the hole with kitchen twine or string and tie a knot so they’re ready to hang as a decorative edible ornament. Dust with powdered sugar if desired.

My Pro Tips
Recipe Tips
- Room temperature butter: Ensure the butter is softened (at room temperature) for easy creaming with the sugar.
- Avoid over-mixing: When incorporating the flour, mix just until combined to keep the cookies tender.
- Chilling is essential: The dough should be well-chilled to make it easier to work with and help the cookies keep their shape.
- Roll evenly: Aim for a thickness of about 1/4-inch so the cookies are neither too thin nor too thick.
- Use parchment or a silicone baking mat: This prevents sticking and make it easier to remove the cookies after baking.
- Adjust the hole: It’s easiest to adjust the hole size while the cookies are warm, as they’ll harden once fully cooled.
- Freeze dough for later: The dough can be frozen after cutting, then baked straight from the freezer, just add a couple of extra minutes.
- Decorating options: Add icing, sprinkle with colored sugar, or decorate with festive sprinkles.
- Flavor variations: Try adding orange zest or cinnamon for a more festive touch.

Storing The Cookies
If you’re using these as ornaments, they can be left out for a few days. With kids around, they probably won’t last long as decoration! Otherwise, keep them in a tin or air-tight container on the counter at room temperature for up to 5 days. Like most cookies, don’t store these in the fridge, they’ll end up turning too soft.

More Holiday Cookies To Try
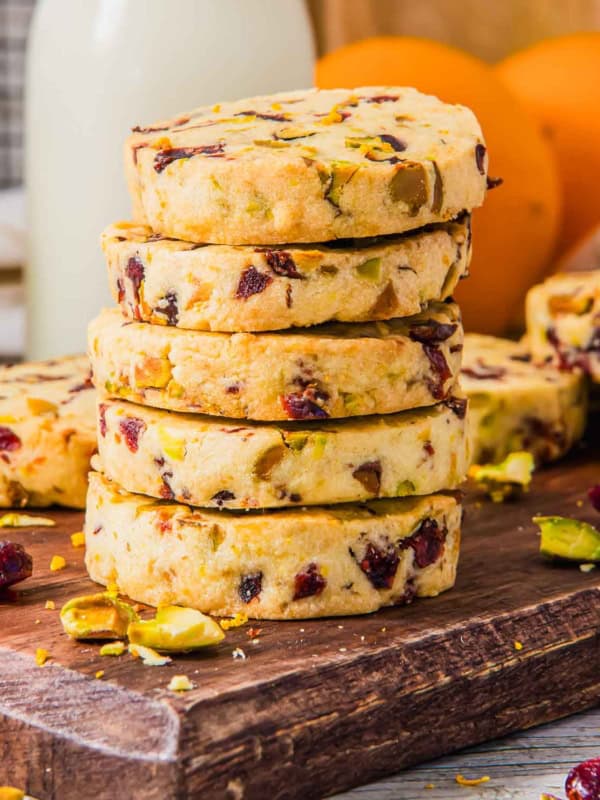
It’s hard to choose just a few to highlight, but these cranberry chocolate chip cookies are an all-time favorite for the combination of tart cranberries and sweet chocolate.
For the gingerbread lovers, I adore these gingerbread collagen cookies. They’re rolled in sugar and don’t be off put by “collagen” in the name. They’re just higher in protein than a normal cookie which means you can eat more!
Thumbprints are a classic around the holidays and I have a few favorites to share. These vegan thumbprints are so simple and bursting with almond flavor. For the chocolate lovers, try these chocolate thumbprint cookies. Tart cherry fudge thumbprints are like a brownie sundae in cookie form, probably my favorite chocolate cookie on the site.
Christmas Tree Cookies

Equipment
Ingredients
- 1/2 cup softened butter
- 1/2 cup sugar
- 1 egg
- 1 teaspoon vanilla extract
- 1/4 teaspoon salt
- 2 cups all-purpose flour
- 1/2 cup chopped chocolate
- 1/2 cup chopped walnuts
Instructions
- In a large bowl, beat the softened butter with the sugar until creamy and smooth.
- Add the egg and vanilla extract, and beat until fully combined.
- In the same bowl, add flour and salt. Mix just until the dry ingredients are fully incorporated with the wet ingredients, being careful not to over mix.
- Fold in the chopped chocolate and walnuts. You can use a food processor or a knife to chop them to your preferred size. Mix until evenly distributed.
- Shape the dough into a rectangle, wrap it in plastic wrap, and refrigerate for at least 3 hours, or until firm.
- Preheat the oven to 350°F. Remove the dough from the fridge and roll it out on a lightly floured surface to about 1/4 inch thickness. Use a Christmas tree-shaped cookie cutter to cut out the cookies.
- Place the cookies on a baking sheet lined with parchment paper. Use a straw or similar tool to make a small hole at the top of each cookie (to thread a string through later for hanging).
- Place the cookies in the freezer or fridge for 5 minutes to help them keep their shape during baking.
- Bake in the preheated oven for about 12 minutes, or until the edges are lightly golden.
- Remove from the oven, and while the cookies are still warm, gently enlarge the hole with a straw if needed, as they will harden as they cool.
- Allow the cookies to cool completely. Thread a string through the hole, tie a knot, and they're ready to hang! Dust with powdered sugar if desired.
Nutrition
Nutrition information is automatically calculated, so should only be used as an approximation.

Gina Matsoukas is an AP syndicated writer. She is the founder, photographer and recipe developer of Running to the Kitchen — a food website focused on providing healthy, wholesome recipes using fresh and seasonal ingredients. Her work has been featured in numerous media outlets both digital and print, including MSN, Huffington post, Buzzfeed, Women’s Health and Food Network.